Analytics, User Feedback, and SEO
Adding Analytics
The Docsy theme builds upon Hugo’s support for Google Analytics, which Hugo provides through embedded templates. Once you set up analytics as described below, usage information for your site (such as page views) is sent to your Google Analytics account.
Prerequisites
You will need an analytics ID for your website before proceeding (technically it’s called a measurement ID or property ID but we’ll use the term “analytics ID” in this guide). If you don’t have one, see the How to get started section of Introducing Google Analytics 4 (GA4).
Your project’s analytics ID is a string that starts with G- (a GA4
measurement ID) or UA- (a universal analytics property ID).
Setup
Enable Google Analytics by adding your project’s analytics ID to the site configuration file. For details, see Configure Google Analytics.
While you can configure your project’s analytics ID by setting either the
top-level googleAnalytics config parameter or services.googleAnalytics.id,
googleAnalytics was deprecated in Hugo 0.120.0 and will be
removed in a future release.
Do not define both parameters, otherwise this can result in unexpected behavior. For details, see Is services.googleAnalytics.id an alias for googleAnalytics.
Analytics are enabled only for production builds (called “environments” in Hugo terminology). For information about Hugo environments and how to set them, see the following discussion.
User Feedback
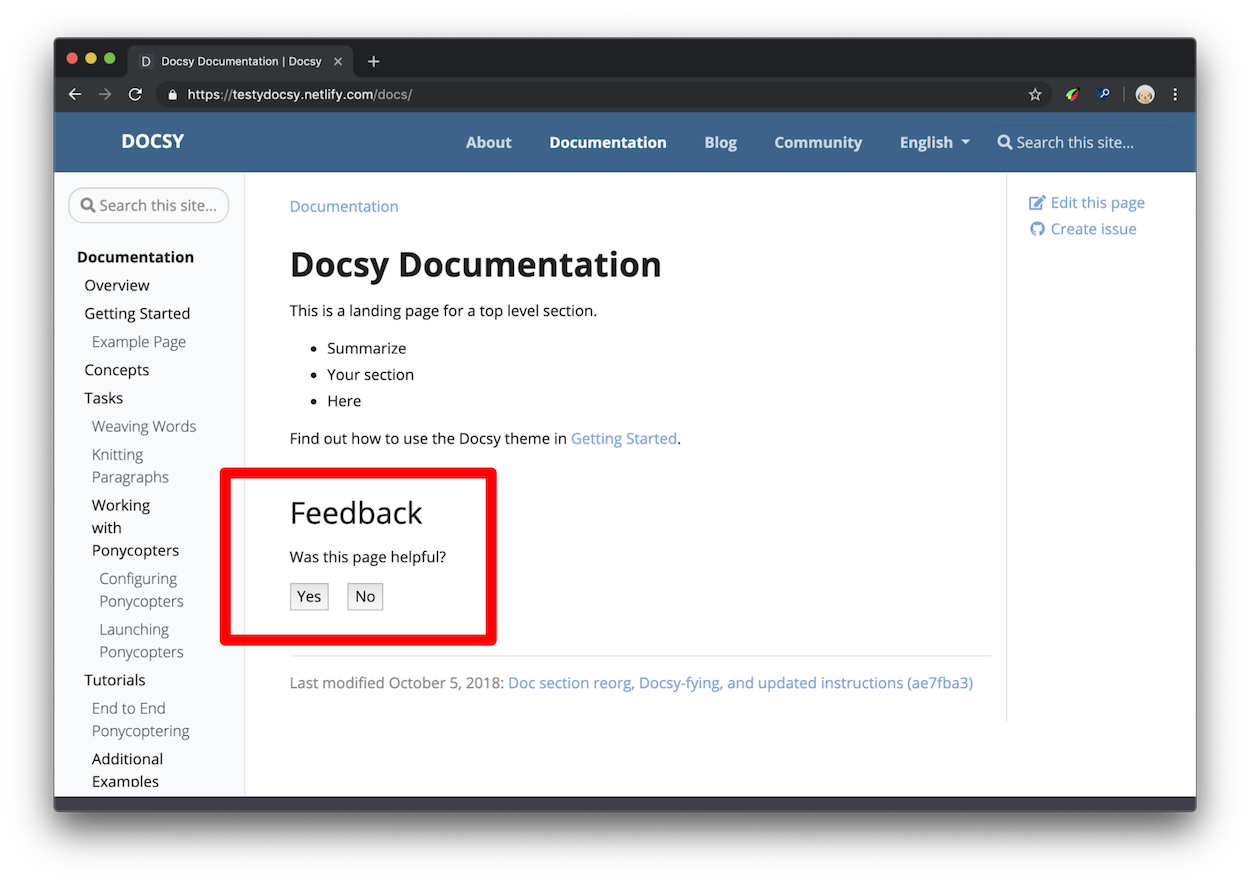
By default Docsy puts a “was this page helpful?” feedback widget at the bottom of every documentation page, as shown in Figure 1.
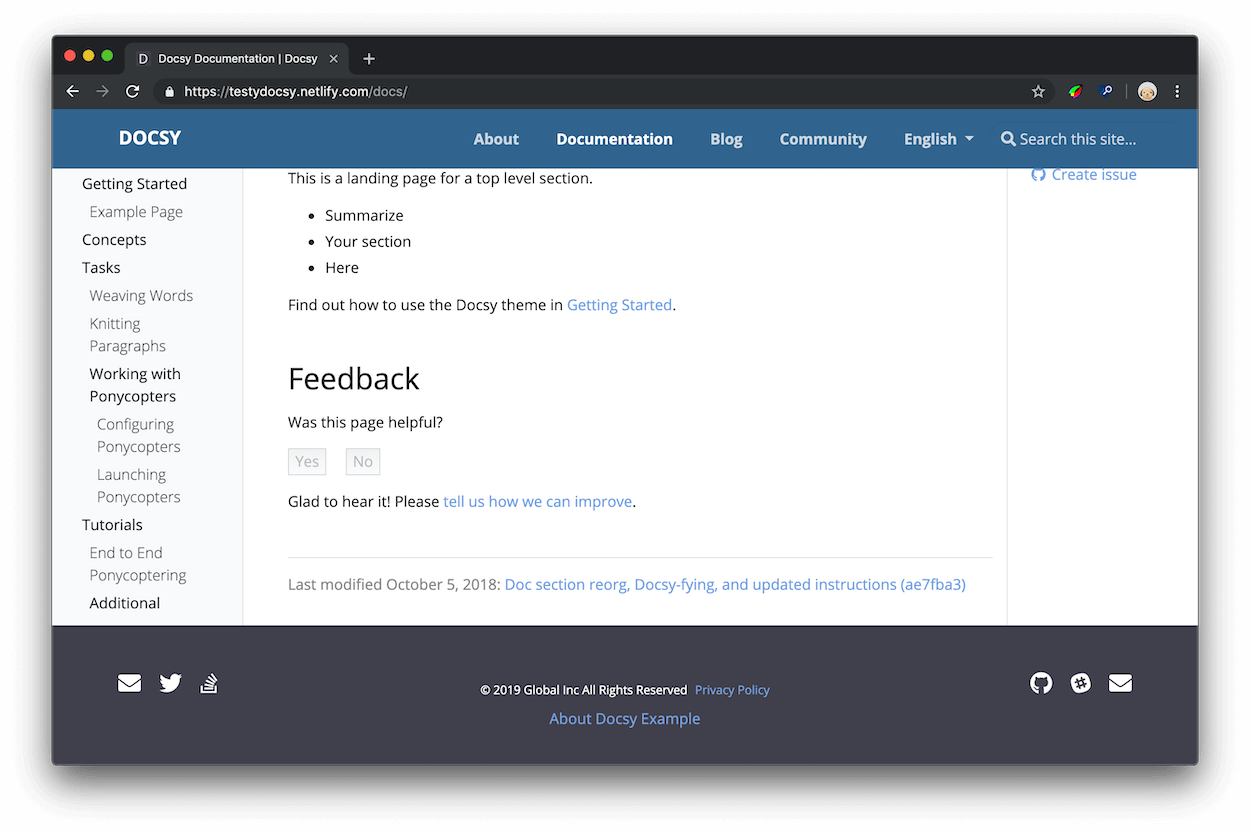
After clicking Yes the user should see a response like Figure 2. You can configure the response text in your project’s configuration file.
How is this data useful?
When you have a lot of documentation, and not enough time to update it all, you can use the “was this page helpful?” feedback data to help you decide which pages to prioritize. In general, start with the pages with a lot of pageviews and low ratings. “Low ratings” in this context means the pages where users are clicking No — the page wasn’t helpful — more often than Yes — the page was helpful. You can also study your highly-rated pages to develop hypotheses around why your users find them helpful.
In general, you can develop more certainty around what patterns your users find helpful or unhelpful if you introduce isolated changes in your documentation whenever possible. For example, suppose that you find a tutorial that no longer matches the product. You update the instructions, check back in a month, and the score has improved. You now have a correlation between up-to-date instructions and higher ratings. Or, suppose you study your highly-rated pages and discover that they all start with code samples. You find 10 other pages with their code samples at the bottom, move the samples to the top, and discover that each page’s score has improved. Since this was the only change you introduced on each page, it’s more reasonable to believe that your users find code samples at the top of pages helpful. The scientific method, applied to technical writing, in other words!
Setup
As of Docsy version 0.8.0, feedback will be enabled whether
site.Config.Services.GoogleAnalytics.ID is set or not. This supports the use
case where analytics is configured outside of Docsy.
Open your project’s Hugo configuration file.
Set the response text that users see after clicking Yes or No.
[params.ui.feedback] enable = true yes = 'Glad to hear it! Please <a href="https://github.com/USERNAME/REPOSITORY/issues/new">tell us how we can improve</a>.' no = 'Sorry to hear that. Please <a href="https://github.com/USERNAME/REPOSITORY/issues/new">tell us how we can improve</a>.'params: ui: feedback: enable: true 'yes': >- Glad to hear it! Please <a href="https://github.com/USERNAME/REPOSITORY/issues/new"> tell us how we can improve</a>. 'no': >- Sorry to hear that. Please <a href="https://github.com/USERNAME/REPOSITORY/issues/new"> tell us how we can improve</a>.{ "params": { "ui": { "feedback": { "enable": true, "yes": "Glad to hear it! Please <a href=\"https://github.com/USERNAME/REPOSITORY/issues/new\"> tell us how we can improve</a>.", "no": "Sorry to hear that. Please <a href=\"https://github.com/USERNAME/REPOSITORY/issues/new\"> tell us how we can improve</a>." } } } }
- Save the edits to your configuration file.
By default, Docsy emits an event value of 100 when a user clicks “yes”. You can
change this value by setting params.ui.feedback.max_value to a positive
integer. Docsy uses 0 for “no” events.
Access the feedback data
Page feedback is reported to Google Analytics through events.
As of Docsy version 0.8.0, page feedback is reported as custom page_helpful
events, rather than click events.
This section assumes basic familiarity with Google Analytics. For example, you should know how to check pageviews over a certain time range and navigate between accounts if you have access to multiple documentation sites.
- Open Google Analytics.
- Open Reports > Engagement > Events.
- Click page_helpful in the events table. If there is no
page_helpfulevent, then none have been registered for the selected period. Adjust the period as necessary.
Note that you might be required to create a custom report if you’d like better visualize individual data points (per page) along with average values.
Disable feedback on a single page
Add the parameter hide_feedback to the page’s front matter and set it to
true.
+++
hide_feedback = true
+++
---
hide_feedback: true
---{
"hide_feedback": true
}Disable feedback on all pages
Set params.ui.feedback.enable to false in
hugo.toml/hugo.yaml/hugo.json:
[params.ui.feedback]
enable = falseparams:
ui:
feedback:
enable: false{
"params": {
"ui": {
"feedback": {
"enable": false
}
}
}
}Add a contact form with Fabform
You can create a contact form for your site and collect your form submissions at fabform.io. To use this feature, you first need to sign up for an account with Fabform. The following example shows how to add a simple form that collects the user’s email address to your site source:
<form action="https://fabform.io/f/{form-id}" method="post">
  <label for="email">Your Email</label>
  <input name="email" type="email" />
  <button type="submit">Submit</button>
</form>
For more details, see Add a Hugo contact form in the Fabform documentation.
Search Engine Optimization meta tags
To learn how to optimize your site for SEO see, Search Engine Optimization (SEO) Starter Guide.
Google
recommends
using the description meta tag to tell search engines what your page is about.
For each generated page, Docsy will set the content of the meta description by
using the first of the following that is defined:
- The page
descriptionfrontmatter field - For non-index pages, the page summary, as computed by Hugo
- The site description taken from the site
params
For the code used to perform this computation, see page-description.html.
Add more meta tags as needed to your project’s copy of the head-end.html
partial. For details, see
Customizing templates.
Feedback
Was this page helpful?
Glad to hear it! Please tell us how we can improve.
Sorry to hear that. Please tell us how we can improve.